Cigar Jewelry Presentation Box Tutorial

In this post you will find a step-by-step photo tutorial on how to make an upcycled cigar jewelry presentation box of my own original design.

It is not mandatory to use a cigar box; any flat, shallow box of similar size and proportions will do. Cigar boxes just happen to be the most readily available, and are sometimes valuable works of art in their own right. Vintage cigar boxes are wonderful, since they have had time to collect some “character” with age.

Beading and jewelry design is an interest I picked up in early 2021 with the original intention of exclusively making custom pieces for myself. However, my interest quickly grew to creating custom pieces for family and friends. My “mix-and-match” themed jewelry sets typically include a combination of necklaces, bracelets, and earrings all designed to coordinate with each other.

"Lux Vitae" Mix-and-Match Jewelry Set (Amber and Citrine, Czech Glass)

“Lux Vitae” Mix-and-Match Jewelry Set (Amber and Citrine, Czech Glass)

Recently, I started searching for a way to package my jewelry sets that would preserve the “wow” factor of revealing all the pieces at once. Due to the number of pieces, I eventually determined that I would have to create something myself. This tutorial is the result: a simple design that can accommodate many kinds of jewelry, and can be easily adapted and customized for your own needs.

Step One: Gather the Materials

To make your cigar jewelry presentation box, you will need:

a cigar or similar flat, shallow box
3/16″ thick foamcore board slightly larger than the inside of your box
a piece of low-loft batting slightly larger than the inside of your box
approximately 1/2 yard of velvet or similar thick, soft fabric*
enough crochet or stretch lace to wrap around your board
12″ – 24″ of matching 5/8″ satin ribbon
sewing machine or ability to hand-sew
scissors, sewing pins, T-pins
double-stick tape

*I cannot recall exactly how much velvet I had to start because I bought it for something else that I never made. The amount needed is easy to eyeball!

Materials Needed for Upcycled Cigar Jewelry Presentation Box

Step Two: Cut the Board

Measure the inside of your box, and note the size on a scrap of paper for further reference. I included my measurements to help you understand what I am doing, but use your own measurements. First, you want your foamcore board trimmed 1/4″ smaller than the dimensions of the inside of your box.

The board must be cut 1/4″ smaller so that it still fits with fabric wrapped around it. A frame shop can cut foamcore board to size for you, if you cannot yourself.

Measurements for Upcycled Cigar Jewelry Presentation Box

Step Three: Cut and Pin the Fabric

Next, we are going to trim the fabric for the jewelry board 1″ larger than the dimensions of the inside of the box in width, and slightly more than double the length. The extra fabric is going to fold underneath the jewelry board to protect chains wrapped from the front or anything else you wish to tuck away there.

To make the cover piece, which will help protect your jewelry and keep it in place, cut the fabric 1″ larger than the dimensions of the inside of your box all around.

Velvet tends to slip while cutting, so I pinned each side as I went.

Measuring Out the Fabric for the Jewelry Cover and Board

When you finish pinning, notch the corners to reduce bulk later.

Cut and Pinned Fabric for the Jewelry Cover and Board

Step Four: Cut and Pin the Jewelry Loops

Decide which end of the jewelry board fabric is the “top,” unpin it, then fold it toward you, as shown in the photo. Cut four small pieces of ribbon a few inches long. These will form the loops that secure your bracelets and necklaces.

Making the Ribbon Loops for the Jewelry Board

Pin the ribbon loops near the end to make them easier to work with, and then space them across the top of the jewelry board fabric. How much ribbon you put inside the fabric will determine the size of your loop. I used about 1″ long loops, but for chunkier jewelry you may want to make them larger.

We will be making a 1/2″ hem that is going to eat up some of the loop!

Securing the Ribbon Loops for the Jewelry Board

Fold the top of the jewelry board fabric back up over the loops. Pin everything into place, taking care to pin the loops inside the fabric so they do not move while you are sewing. Trim off any extra ribbon leftover outside the fabric.

Trimming the Ribbon Loops for the Jewelry Board

Step Five: Sew the Fabrics

Sew the cover piece first, as it is almost finished at this stage. Make a 1/2″ hem all the way around, except for a 1″ break in the stitching. When you have finished hemming, turn the fabric right-side-out through the 1″ opening, and then pin it all the way around again to keep the two layers flat and smooth.

Hemming the Jewelry Cover

Sew around the cover piece again, about 1/2″ in, to give it a finished edge.

The cover piece is all done! You can set that aside for now.

Finishing the Jewelry Cover

For the jewelry board fabric, first sew a 1/2″ hem across the top, where your ribbon loops from Step Four are pinned. This is optional, but I triple-stitched the top hem where the ribbon loops are held to reinforce it. Then sew a 1/2″ hem up the two sides. Leave the bottom of the jewelry board fabric completely open!

Turn your jewelry board fabric right-side-out, and tidy your ribbon loops.

Top of the Jewelry Board Fabric with Loops

Make sure your board fits into the jewelry board fabric. It should fill, but not stretch, the fabric. If you have to force it, then trim down your board a little, or cut a new piece of board. There must be room left for the low-loft batting.

Confirm the Size of the Foamcore Board

After confirming that your board is the correct size, cover one side with several strips of double-stick tape. I used acid-free adhesive-transfer tape, but any high-tack permanent tape will do. Lay the board, tape-side-down, on top of the low-loft batting, and then press it firmly to fix the batting into place.

Apply Double-Stick Tape to the Foamcore Board

Trim the low-loft batting to the size of the board. It does not have to be perfect.

Attach the Foamcore Board to the Low-Loft Batting

Choose which side of the jewelry board fabric is the front, and insert your board with the low-loft batting facing up. Slide the board all the way up to the top edge with the ribbon loops. Flatten out any bunched-up batting at the top corners with your fingers. This will give your jewelry board a professional quilted look when completed, and provide additional protection for your jewelry.

Slide the Foamcore Board with Batting into the Jewelry Board Fabric

With your board in place, pin the jewelry board fabric together underneath it.

Pin the Foamcore Board Inside the Jewelry Board Fabric

Sew a stitch along the bottom of your board as closely as possible.

Stitch the Foamcore Board Inside the Jewelry Board Fabric

Fold the remaining fabric underneath your jewelry board. This is how the jewelry board will lay inside your cigar box. Trim any excess away as shown.

Trim Away any Excess Jewelry Board Fabric

Turn in the unfinished bottom edge enough for a 1/2″ hem, pin, and then sew across in the same way that you finished the edges of the cover piece.

Turn in the Unfinished Jewelry Board Fabric and Hem

Step Six: Finishing Touches

Cut a large ribbon loop that will function as a handle or tab for lifting up the jewelry board out of your cigar box. Attach it securely to the back of the jewelry board near the top. I used two T-pins sharply-angled into the foamcore board. This causes the force/stress to be directed onto your board, not the fabric.

Failure to secure this loop to your board will result in holes or rips.

Attach the Ribbon Loop

Wrap your crochet or stretch lace around the jewelry board and pin. It should be snug enough to stay in place, but not so tight that it digs into the padding.

Measure the Crochet or Stretch Lace and Pin

Sew the crochet or stretch lace, then slip it back onto the jewelry board.

Sew the Crochet or Stretch Lace

Step Seven: Add the Jewelry

Finally! It is time to add the jewelry to your upcycled cigar jewelry presentation box! Use the ribbon loops to secure necklaces and bracelets at the top of the box, and attach earrings through the holes in the crochet or stretch ribbon lace.

Secure Your Jewelry to the Jewelry Board

Gently place any chain or other extra pieces between the jewelry board and the folded fabric underneath, then fit your completed project inside the cigar box.

Upcycled Cigar Jewelry Presentation Box

Congratulations! You have successfully created your own upcycled cigar jewelry presentation box! Take a moment to appreciate your work. Place the cover piece over your jewelry, and then wrap the closed cigar box with a decorative ribbon or string if it is a gift. I am sure your family or friend will absolutely love it!

If you make and share this project, please link back to my tutorial, and tag #JCB8MN and #LivingCr8tively so I can see your creation!

CATEGORY:

JC B8MN: A Mission and A Vision

The end of the year is traditionally a time for reflection. The end of 2022, probably the most transformative year of my life thus far, is no exception. The past year required me to fight a powerful battle with external forces attempting to sabotage my progress and keep me trapped in my past. I made the decision to abandon everything that has ever been used to control or mentally imprison me and move forward in my own truth. Last May, I killed off my alter ego of more than twenty years. I am now working under my real name and JC B8MN.

New Life

This year began with a new job unlike any I had ever had before, which I carefully selected with my specific needs, strengths, and weaknesses in mind. I am happy to tell you that I have flourished in that position. Having the autonomy and authority to do what I do best: analyze, prioritize, reorganize, systematize, and recognize untapped opportunities has helped contribute to compounding improvements in my workplace. Senior management is impressed.

The combination of being medicated for my ADHD, and reestablishing stability with a suitable day job, has made me the most functional and independent I have ever been. My employment provides me with the physical exercise I need without mental depletion or sensory overload. At the end of my day, I have more energy for activities of daily living and creative projects. It feeds an upward spiral.

After we failed to get Dan’s SSDI approved, Dan began working again. He needs more outside support than me, as his challenges are greater than mine now. I am grateful that I am able to provide that. Our family is also amazingly supportive of both of us. As time passes in a healthy and nourishing family environment, the confusion and trauma of the past continues to lose power and fade away.

Dan and Jen's Wedding Celebration

Our wedding celebration in September was the most beautiful day of the year. Truly, we are blessed to have some of the most caring and wonderful friends that anyone could ever wish for. Dan is enjoying his group gaming activities and slowly resuming his musical projects. When not working on my art and comics, of late, I am back in the kitchen and completing other unfinished projects. All is well.

The JC B8MN Mission

Rebuilding from the ground up has given me a unique opportunity to achieve a mature unity of aesthetic and vision that my work never had in the past. Lessons learned, and experienced gained, from over twenty years of experimentation are now synthesized into one clear mission and voice. Disparate and incongruous projects are now combined into a few core series with shared purpose.

In the future, every new concept or idea must pass the following tests: Does this serve my mission? Is this consistent with my personal and moral values?

The JC B8MN Mission

JC B8MN’s mission is to advocate and educate for the rights of autistic and neurodivergent people, and to promote self-exploration for all people through art and creativity in daily life.

To that end, I now have a profile on SpeakerHub. My desire is to channel the effort I used to spend promoting myself at comic book conventions into education and outreach instead. The strange circumstances of my life have shown me to be unusually resilient. Consequently, I feel a responsibility to do what I can to help others living through struggles similar to mine. I am one of the lucky ones.

Over the course of my life, my artistic abilities evolved to compensate for my struggles with other forms of communication. I believe my visual language can be a valuable tool for revealing the autistic experience to those who do not live it. I believe my work can help bridge the “double-empathy problem” to increase compassion for neurodivergent people and facilitate better relationships.

The JC B8MN Vision

I am excited to announce the relaunch of my commerce and websites.

My new logos are complete, and custom sketch card commissions have returned for Patreon subscribers. My TeePublic storefront has been reopened, and I will be continuing to upload new designs as they are completed. For simplicity’s sake, TeePublic is the only print-on-demand service I am using at this time.

I expect to reopen my Etsy shop within the next few weeks.

JC B8MN Circle Top Hat Logo

My art and photo galleries are in the process of being refreshed and rebuilt.

JC B8MN Triangle Eye Logo

Finally, Dan and I are preparing to start producing videos for my new YouTube channel. My new efforts will be sure to incorporate the most-enjoyed elements of my past work, while also being more consistent and timely. You can also expect to see the return of Trashy the Rat, since I consider him to be the first major creation of Jen Bateman. I love writing for, and performing, Trashy.

New Work

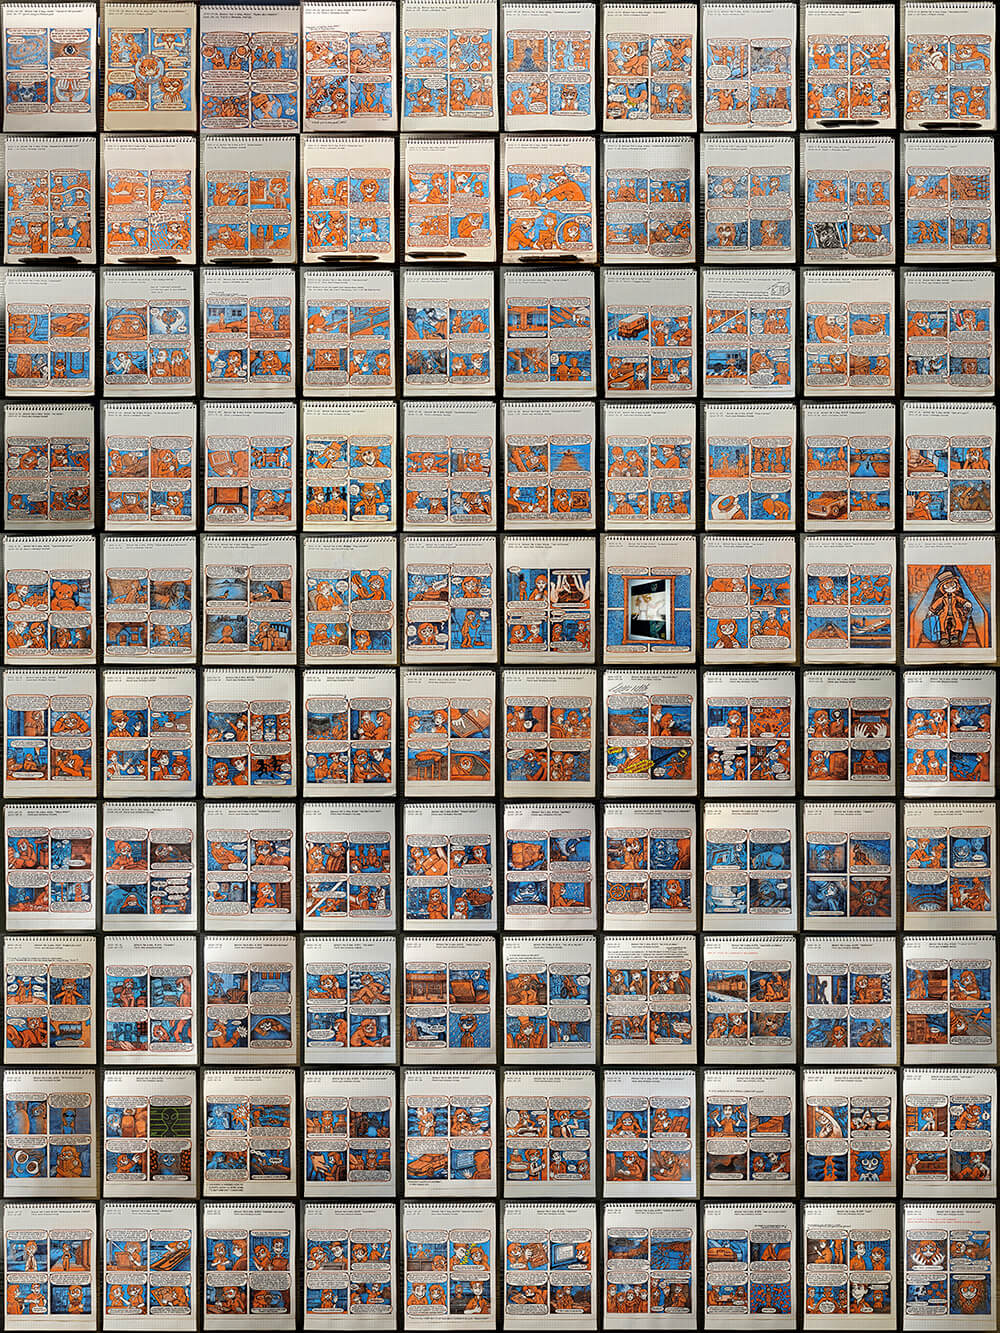
Of course, I know the most burning question on everyone’s mind must be: But Jen, what about the comics? My new webcomic, Behind the 8-Ball, is on schedule to launch publicly in mid-2023. Unlike my past efforts, this series is an ongoing, narrative autobiography designed for print as multiple books from the outset.

Behind the 8-Ball is a chronological account of my life story, focusing on how childhood abuse, undiagnosed ADHD and autism, and other notable events and relationships have affected me. It is not always an easy read, but I think it is an important one. It is the heart and soul of my overarching mission to increase acceptance and understanding for autistic and neurodivergent people.

To avoid my past production issues, I am building in multiple levels of buffers before public launch. Each step is far ahead of the next: outlines, scripts, rough drafts, and lastly, finished comics. I am still testing various techniques, but the final product will be 100% digital. Digital inking is faster and more forgiving.

Subscribers to my Patreon can read “work-in-progress” comic drafts now.

Be one of the first to read my new autobiography by becoming a Patreon subscriber!

Many, if not most, of the important and influential people in my life are actively involved in the creation of this work. Feedback from my Patreon subscribers and test readers has been overwhelmingly positive so far. I am glad to not only share my story, but to thank the people who have been there for me at critical times and — in some cases — may have unknowingly helped save my life.

I hope you will choose to support my new work and JC B8MN in 2023.

May you all have a peaceful, healthy, and Happy New Year.

CATEGORY:

Crafting Our Future

As you may recall, Dan and I eloped last November. We are hosting a belated wedding reception for our family and friends — happening soon! Our party will be a casual, picnic-style event held outdoors. What better way to celebrate our union than with crafts representative of the aesthetic and lifestyle we share?

Dan and I are both still struggling to get out from under a significant amount of debt. I have been selling off my personal belongings of any significant value, but it has not been enough to keep up with our expenses. If you can, please consider helping us purchase our flowers and food. Click here to view our GoFundMe.

It has been a long, difficult road for both of us — and we both survived.

Celebrate With Us

“When you arise in the morning, think of what a precious privilege it is to be alive — to breathe, to think, to enjoy, to love.” – Marcus Aurelius

Our first collaborative artwork — a design for our postcard party invitations.

Materials: 6.5″ x 4.5″ on 140lb hot press watercolour paper; India ink, Bombay coloured inks; watercolour; Hunt 100 Artist Nib; small round brushes.

Lines, inking, and digital edits by me. Watercolour by Dan.

Celebrate With Us

Busy busy busy!

Below are the hand-crafted decorations and favours I have been working on for our wedding party since March! You can find tutorials for making these items with a simple Google search, so I am only including tips that I did not come across.

My goal was to use as much secondhand, thrifted, and upcycled materials as possible — both to save money and be more environmentally-friendly.

A riot of fresh flowers as the finishing touch is my one and only splurge.

Click on the photos to see more on my Instagram account!

Jen with Crafted Party Decorations

Craft Project: Decoupage Soup and Vegetable Cans

Time: About .5 hour per can, including design, application, and top coats.

Materials: Washed and dried empty cans, old books and scrapbook paper, washi stickers, used stamps, matte Mod Podge, matte acrylic varnish.

Tip: After applying all your decorations, let the Mod Podge thoroughly dry. Rub the can in your hands, letting the warmth from your fingers help shape the paper to the can ridges, and then apply a second coat of Mod Podge. Allow to cure 2-4 weeks, then varnish. Matte acrylic varnish gives a lovely, flat paper look.

Craft Project: Decoupage Soup and Vegetable Cans

Craft Project: Fabric Rag Garlands (5 – 5.5ft)

Time: About 7 – 8 hours per garland, including cutting the fabric strips. Some fabric is faster to cut than others, such as cotton versus a slippery satin, so there are many variables involved. My garlands have roughly 225-250 strips each.

Materials: Thrifted bed sheets, curtain panels, and tablecloths; secondhand fabric; printed quilting fabric; lace ribbon, reclaimed and salvaged buttons and beads, assorted beads, beading cord, braided jute rope.

Tip: Don’t skimp on the quality of rope! These garlands are heavy.

Craft Project: Fabric Rag Garlands

Craft Project: Decoupage Institutional Food Cans

Time: About 1 hour per can, including design, application, and top coats.

Materials: Washed and dried empty cans, old books and scrapbook paper, washi stickers, used stamps, matte Mod Podge, matte acrylic varnish.

Tip: Measure the height and approximate circumference of your can, and arrange your decorations on a tabletop before you start gluing. Once you start layering papers, it is nearly impossible to insert or rearrange items while you work.

Craft Project: Decoupage Institutional Cans

Craft Project: Bead and Tassel Garlands (4.5ft)

Time: About 1.5 – 2 hours per garland, including cutting the fabric strips and making the tassels. I made these almost entirely on breaks at my day job!

Materials: Thrifted yarn, vintage Quaker Net curtain cut into .5″ strips, reclaimed and salvaged wood beads, assorted beads, craft bells, jute cord and rope.

Tip: I cut drinking straws into three sections. I made each tassel with a straw piece going through the middle, instead of a string to hang. This allowed me to thread the jute cord through the straw piece easily and quickly, and then remove it afterward. I wanted the tassels inline with the beads, instead of dangling.

Craft Project: Bead and Yarn Tassel Garlands

Craft Project: Decoupage Wreaths

Time: About 2 – 3 hours per wreath including tearing the paper strips, decoupage, top coats, and adding the flowers and embellishments.

Materials: Foam wreath forms, old books and scrapbook paper, matte Mod Podge, matte acrylic varnish, donated and scavenged faux flowers, feather butterflies, craft bells, jute cord and rope. Round wood ornament made by Snapfish.

Tips: I made a mixture of 1 part water, 2 parts Mod Podge, and submerged the paper strips in it similar to the method for papier-mâché. This made applying the paper to the curved surface of the wreath much easier. I then applied two separate, additional coats of Mod Podge before the final varnish.

Use a scratch awl to puncture the decoupage layer before inserting flower stems. The flowers and greens are attached with hot glue and greening pins. High-temp hot glue melds together the plastic of the flowers and foam very strongly.

In my opinion, Gorilla brand hot glue sticks are worth the extra cost!

Craft Project: Dan and Jen Bateman Wedding Wreath

Painted Coveralls

Time: About 3 – 4 hours for letting layers of paint dry between applications.

Materials: Berne Fisher Stripe coveralls, acrylic paint, spray paint. Props to Berne for being the only company offering enough “off the shelf” sizes for tall Dan and smol Jen to have matching suits. They are comfortable and well-made.

Tips: Don’t forget some good an’ stompy boots!

Dan and Jen Bateman Coveralls

We are looking forward to sharing photos of our event with you, and our many projects to come! Again, if you can, please consider helping us purchase our flowers and food. Click here to view our GoFundMe. Thank you!

CATEGORY: